

I am going to attempt to make your life a little bit simpler with tips on editing your posts and pages on WordPress.com and the self-hosted version of WordPress using the Visual and Text Editors.
Log into your WordPress site and select a post or Page to edit. If you are unsure as to where to find the edit links, you may want to check out “How to Edit a Post or Page” by fellow Clark student Jesse Byars.
If you are a seasoned veteran of HTML, have no fear, you can use HTML to create your posts and pages with the WordPress text editing tab:

When editing using HTML, you need to be aware that if you switch between the text and visual editors, it’s possible for your HTML to be changed by the editor. If you want to edit in text, stay in text, or you could be looking at editing your post all over again!
The options for text editing and visual editing are a bit different. If you have chosen to edit in HTML, you are probably already familiar with the tag options, but WordPress makes your life a little easier with the options:

The b and i are the same editing tools you would find in any document editor, representing bold and italic. If you have already entered the text, all you need to do is select it and click the button to add the open and closing tags to the block of text, cutting your time editing down a small chunk!
The link button will allow you to insert a link:

However, you will still need to put text between the opening and closing tags.
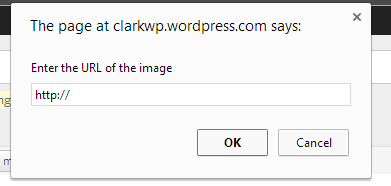
Similarly, the image button will allow you to add an image to which you already have a link to the location:
The b-quote or blockquote HTML tag will add a tag to begin a blockquote, then when you press it again it will close the tag.
The ins and del buttons insert changes or deletes changes and allows you to show an edit to your post so you can see the date and time of your edit.

Which show up in the post looking like:
today I added this
today I deleted this
The HTML tag ul creates an HTML list and will insert the beginning tag for an unordered list (show the list with bullets) and ol will insert the beginning tag for an ordered list (numbered). As always, if you click them again, they will close the tags. Between the tags, the li will open and close the individual list items, and indent them in the code:
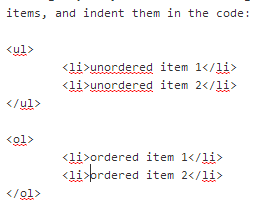
And will ultimately look like this:
- unordered item 1
- unordered item 2
- ordered item 1
- ordered item 2
For more information on lists, see this article on nested lists in WordPress.
The code tag will turn your typed word(s) into a monospace font if used on plain text. If you want to show a section of HTML code, you need to use the character entities for certain symbols and place it between the code tags:
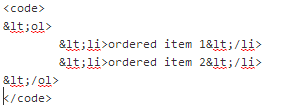
This will show up in your post looking like:
<ol>

<li>ordered item 1</li>

<li>ordered item 2</li>

</ol>
(For a list of other character entities, see: HTML Character code entities.)
Finally, the close tags, proofread, and fullscreen buttons will all do exactly what they say. Well, the proofread won’t do it for you, only make it easier for you to do so!
So there you have it. Editing posts and pages is a breeze in the WordPress text editor!

5 thoughts on “Tips for Using the WordPress Text Editor”